An important construction of the house becomes the roof. She completes the construction of the box of the building, after which there is only decoration. The most common execution scheme with two slopes. The gable roof is made with your own hands without any difficulty, you just need to understand the technology.
Roof structure
Before you begin installing a gable roof, you need to figure out what it is. The design is different from all the other gables. The following varieties can be given, depending on the method of assembling the rafter system:
- single slope - the pediments are in the form of a trapezoid or a rectangular triangle;
- gable is characterized by triangular pediments;
- four-slope (hip) has no vertical faces.
The main elements of the gable roof system are:
- rafters;
- Mauerlat;
- crossbar;
- struts;
- racks;
- contractions (ties);
- crate;
- persistent whetstones and slips.
Rafters are the main supporting structures. It is important when building with your own hands to correctly choose their cross section, otherwise an emergency situation may occur.
Getting Started
Before you make a gable roof, you need to select materials. Installation begins with the choice of wood. To build a reliable construction that is resistant to external factors, you will need to follow these recommendations:
- it will be right to choose the materials of coniferous species of wood (spruce, pine, larch are more resistant to decay);
- assembly of the structure is made of wood of the first or second grade, the use of the third for critical elements is unacceptable;
- it is better to choose those lumber that is produced in the northern regions, the more difficult the conditions for the growth of a tree, the denser its structure;
- try to choose the material that is cut down at the end of the cold season (February-March).
Next, you should choose the cross section of the rafter leg. It depends on the following points:
- load from snow cover (snow area);
- mass of roofing;
- rafter pitch;
- span (distance between reference points);
- insulation thickness.
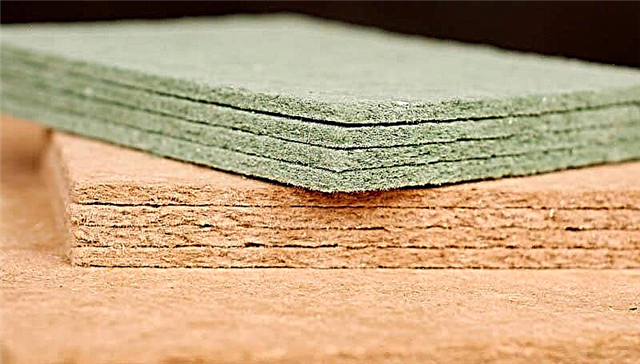
A heat-insulating layer is required when designing in the under-roof space of a house in a dwelling - an attic. Most often, do-it-yourself installation of mineral wool material to improve thermal insulation characteristics. It is important to ensure a ventilation gap between the heat insulator and the roofing. The height of the rafter legs should not be less than the thickness of the insulation. To increase the clearance, such an element of the system is introduced as a counter-lattice - a bar, which is nailed parallel to the rafter leg and increases its height.
The most convenient rafter step for a private house is one that provides a distance between them in the light of 0.58 m.
This allows you to correctly install the mineral wool slabs without undercutting and additional elements. For such a step, the following recommendations for the cross-section, depending on the span, can be given:
- span of 3 m - rafter size 40x150 mm;
- 4 m - 50x150 mm;
- 5 m - 50x175 mm;
- 6 m - 50x200 mm.
It is important to know the following: the bearing capacity and resistance to bending are affected more by height than width. If necessary, increase the bearing capacity to more effectively increase the height.
Another element whose cross section will need to be selected is the crate. The most optimal value will be a thickness of 32 mm. With increased load, the value is increased to 40 mm.
The remaining components of the rafter system of the house are assigned constructively, based on what kind of lumber is available. But at the same time, it is still worth considering the strength requirements.
Immediately after purchasing the material, before assembling the system, you will need to process all the elements with your own hands with special compounds.
Gable, like any other roof of the house, needs the following types of protection:
- antiseptic, produced without fail, allows to prevent the processes of decay and the occurrence of mold and fungus (even if no installation is planned some time after the purchase of wood, processing is carried out immediately);
- fire-retardant, performed as desired, but very important, increases the ability of a tree to resist fire, which increases the safety of the structure.
Installation of the rafter system at home
To build the roof of the house with your own hands, you need to perform all the work in a certain order. Installation of elements does not cause difficulties, but you need to control the quality of nodes and connections. The most important sites are:
- Mauerlat mount to the wall;
- fixing rafters to Mauerlat;
- fastening rafters among themselves.
To properly build a roof with your own hands, the work should be performed in the following order:
- Mauerlat installation;
- installation of rafters at a design angle;
- fastening legs in the upper part;
- unfastening of supporting structures using struts, struts and contractions;
- installation of counter battens, battens, waterproofing;
- do-it-yourself insulation of the roofing system;
- installation of the lower lathing, installation of the roofing.
Next, it is worth considering the main components of the rafter system so that the installation is performed in compliance with the technology.
Mount Mauerlat to the wall
When installing with your own hands, it is important to understand where to put the Mauerlat. A beam with a section of 150x150 mm or 200x200 mm is installed on the inner edge of the outer walls. It is important to ensure sufficient thermal insulation of such a site. The outer part of the fence in this section can be made of the same material as the walls.
In this case, styling is performed at an angle equal to the slope of the ramps. The second option - the space is poured with expanded clay concrete. These methods are relevant for stone houses (brick, foam concrete, expanded clay concrete and the like). If you plan to build a frame or wooden house, the upper binding or the crown of the wall will act as a Mauerlat.
There are several ways to do the work:
- Fastening to staples. To do this, in the penultimate row of masonry, wooden bars are installed, to which the lower part of the brackets will be attached, and the upper one is brought into the Mauerlat. Wooden corks are necessarily impregnated with an antiseptic.
- Fastening to a wire. To perform this option, you need to lay a wire 3-4 mm thick in the masonry of walls or a monolithic belt, its length must be such as to wrap the beam and twist the wire rod.
- Fastening to bolts or studs. The options are similar, but the former provides greater reliability. Fasteners are laid in a monolithic belt. After that, the beam is placed on studs or bolts. To make holes for them in the right places, they gently tap on the Mauerlat. The resulting depressions will be the places for drilling holes. After their preparation, the final installation of the beam in the design position is performed and tightened with nuts.
When building a house, it is also important to know how to build Mauerlat. The standard dimensions of lumber are 6 m, and the walls can be longer. To connect the two elements in length, you need to make a direct lock. To do this, one element is cut out the lower part, and the other upper. Bonding is performed by bolts. It is not recommended to cut at an angle in this case. With the help of a direct cut, angular joints are also made.
The choice of the method of fastening the Mauerlat largely depends on the material of the walls, more precisely on its strength. For lightweight concrete, perimeter casting will be a must.
It is important to provide waterproofing between wood and stone material. For this, roofing material, linocrom or hydroisol are most often used.
Fixing rafters to Mauerlat
There are two most common do-it-yourself options for building a house:
- with a gash;
- without washing down.
In both cases, the rafters are additionally fixed with metal corners on both sides. When using a system with a gash, you will need to process the beam at an angle corresponding to the slope of the roof of the house. When installing without gash, it is necessary to prepare a support beam with your own hands, which will not allow the system element to move across the Mauerlat. As an additional fixation, nails are driven in and twisted from a wire from the foot to the wall (such fastening can be done through one leg).
It is recommended that you familiarize yourself with the series “knots of wooden roofs of residential rural buildings” in order to establish the gable raftering of the house with your own hands to obtain detailed and visual information. This album contains a large number of options for fixing all the elements that will help to complete the installation without errors.